
Open Liberty Starter
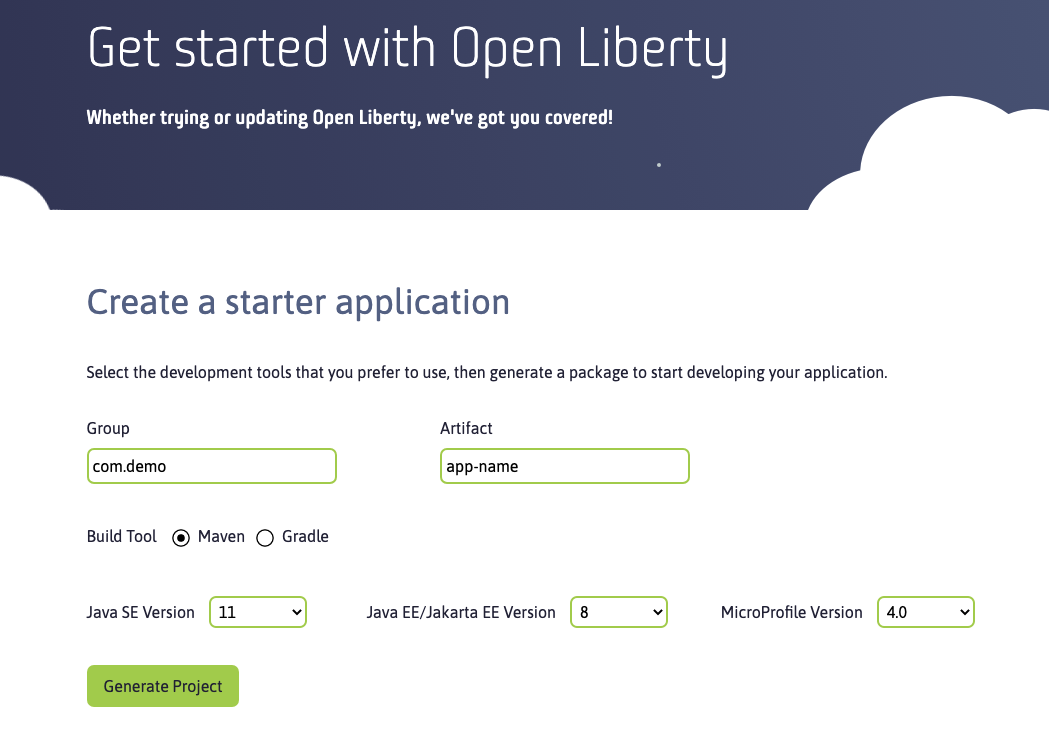
There is now another easy way to get started with Open Liberty. Visit the Getting Started page and select a few options to generate a starter application that runs on Open Liberty. You can specify your application and project name, choose a build tool from either Maven or Gradle, and pick which version of Java SE, Jakarta EE, and MicroProfile your application will use. Then, just click Generate Project and you are ready for lift-off!
What is the starter?
The Open Liberty starter gives you a simple, quick way to get the necessary files to start building an application on Open Liberty. There is no need to search how to find out what to add to your maven or gradle build files. A simple RestApplication.java file is generated for you to start creating a REST based application. A server.xml configuration file is provided with the necessary features for the MicroProfile and Jakarta EE versions that you previously selected.
If you plan on developing and/or deploying your app in a containerized environment, the included Dockerfile will make it easier to create your application image on top of the Open Liberty Docker image.
Once you download the starter project, unpackage the .zip file on your machine.
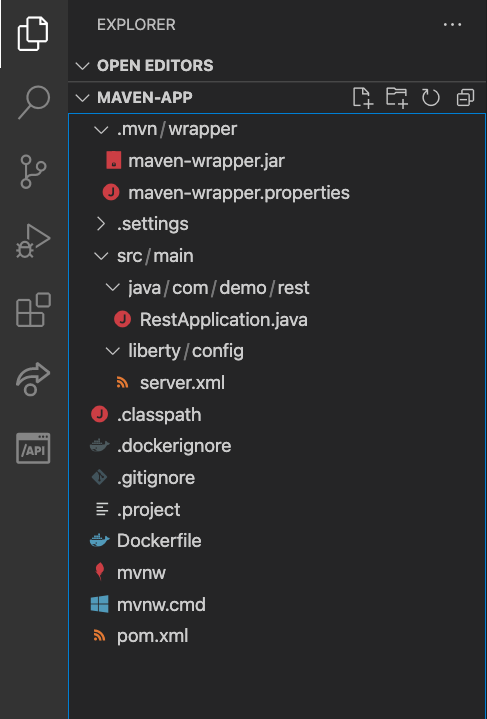
If you selected Maven as your build tool, then open a command line session, navigate to the installation directory, and run mvnw liberty:run. This will install all required dependencies and start the default server. If successful, you will see the necessary features installed and the message "server is ready to run a smarter planet."

A starter project using Maven is generated for you with the following files:
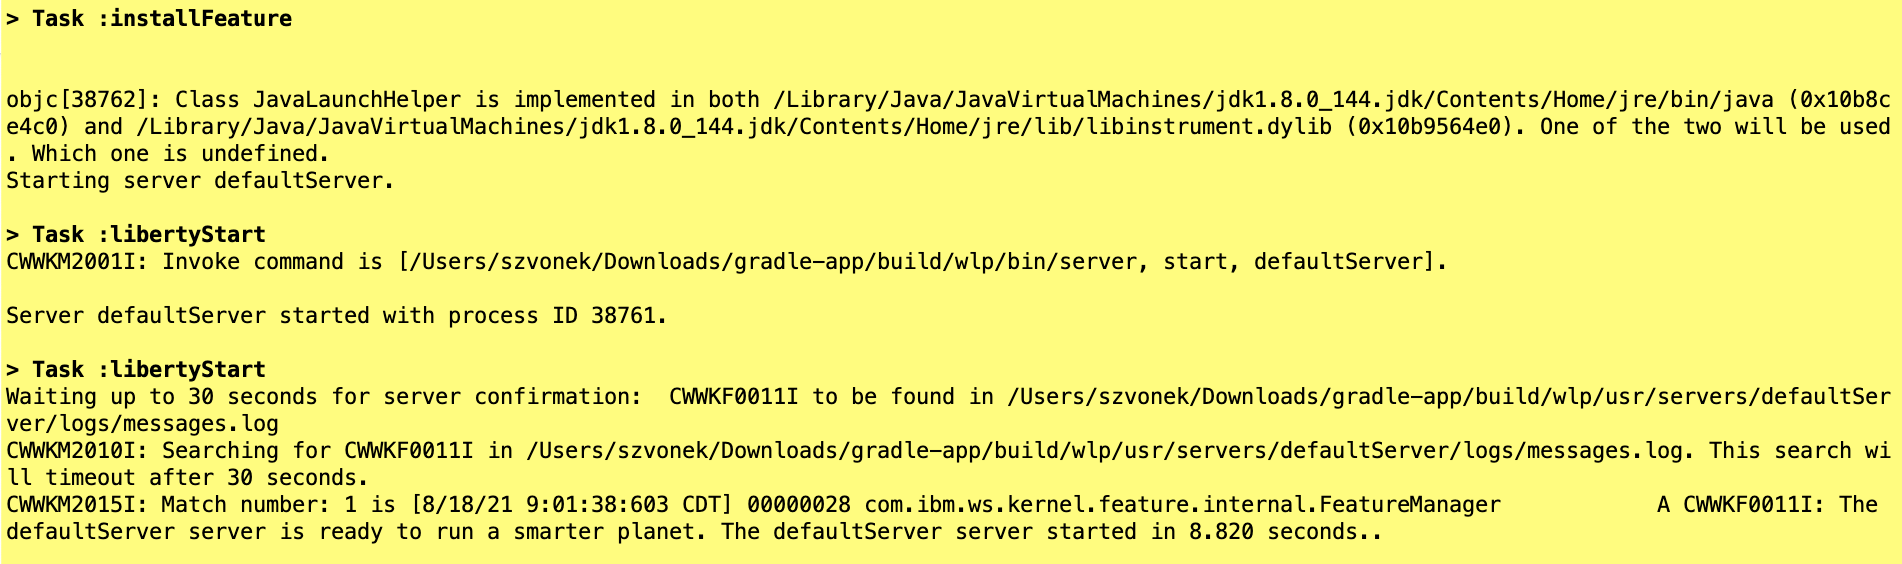
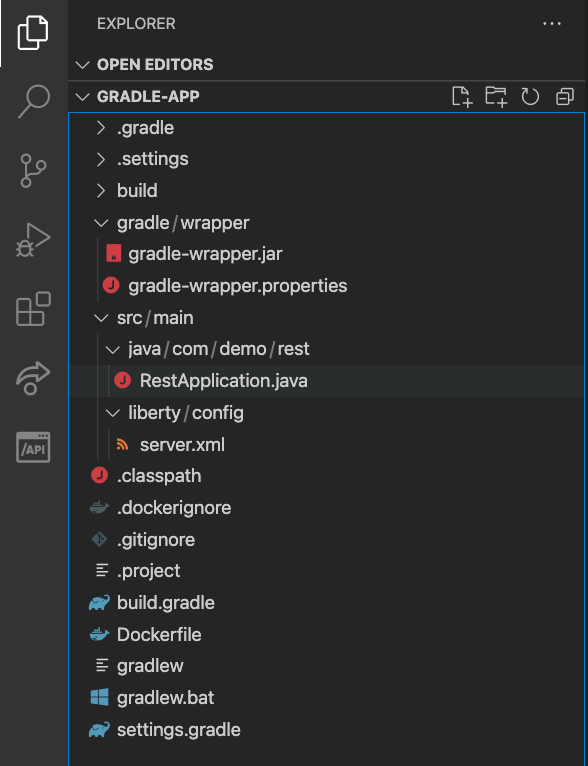
If you selected Gradle as your build tool, then open a command line session, navigate to the installation directory, and run gradlew libertyStart to start the default server. If successful, you will see the necessary features installed from the installFeature task and the message "server is ready to run a smarter planet."
A starter project using Gradle is generated for you with the following files:
For more information on developing your application in dev mode using either Maven or Gradle, see the dev mode documentation.
For further help on getting started actually developing your application, see some of our Microprofile guides and Jakarta EE guides.
Other ways to start using Open Liberty
There are a few other ways to get started with Open Liberty if you prefer instead:
Docker image
You can pull in the official Open Liberty docker image from Docker Hub and build your application image on top of the Open Liberty image. For more information, see our guide on using Docker with Open Liberty, Using Docker containers to develop microservices.
Maven
You can also use Maven to pull in Open Liberty as a dependency for your application. To get started using Open Liberty with Maven, add the following to your pom.xml, while specifying the version of Open Liberty that you want to use:
<dependency>
    <groupId>io.openliberty</groupId>
    <artifactId>openliberty-runtime</artifactId>
    <version>[21.0.0.8,)</version>
    <type>zip</type>
</dependency>
For more information on using Open Liberty and Maven, visit our Maven Intro Guide.
Gradle
You can also use Gradle to pull in Open Liberty as a dependency for your application. To get started using Open Liberty with Gradle, add the following to build.gradle, while specifying the version of Open Liberty that you want to use:
dependencies {
    libertyRuntime group: 'io.openliberty', name: 'openliberty-runtime', version: '[21.0.0.8,)'
}
For more information on using Open Liberty and Gradle, visit our Gradle Intro Guide.
Open Liberty Binary Package
Download an Open Liberty release from our Getting Started page and extract the package. Then navigate to the bin directory and execute the server create <server_name> command to create an Open Liberty server, or run the server start command to automatically create and start a defaultServer. Then, you can add in your application to the dropins directory, or add the path to your application in the newly created <path_to_Open_Liberty_install>/servers/<server_name>/server.xml.
For more information regarding Liberty commands and configuration, visit the Command overview and Server configuration overview docs.


