Securing Open Liberty with Red Hat single sign-on (RH-SSO)


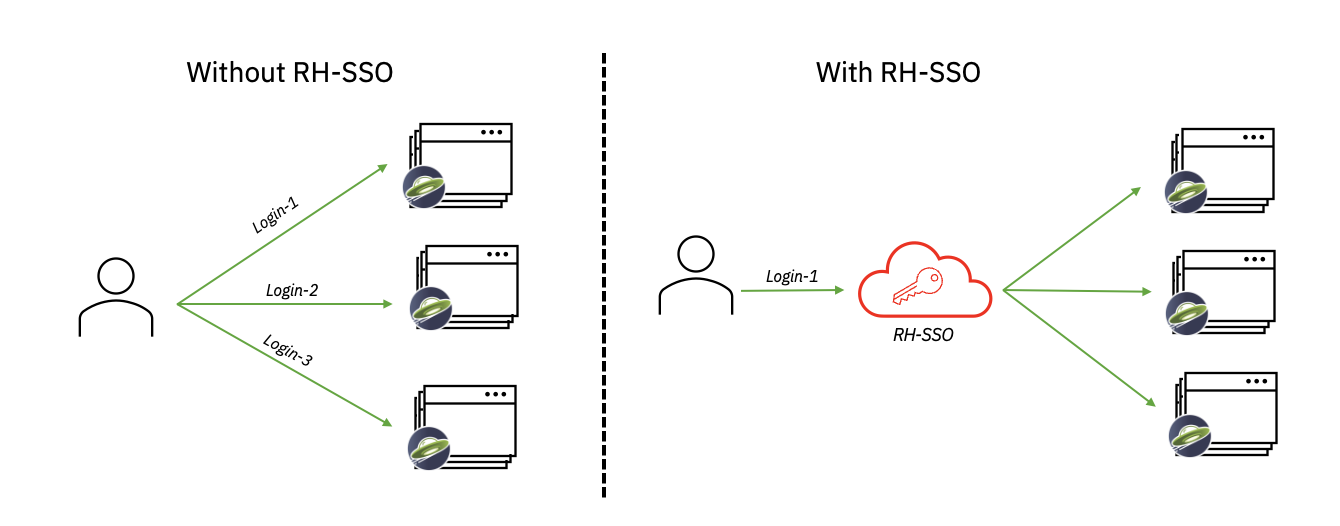
Single Sign-On (SSO) is a common mechanism to protect cloud applications that allows users to authenticate once and access multiple applications and resources without re-entering credentials. It boosts productivity by eliminating the need for repeated logins, while also reducing the attack surface by requiring only one set of credentials.
To configure SSO, you can use providers such as GitHub, Google, Facebook, or OpenID Connect (OIDC). The advantage of using OpenID Connect is that it provides a standardized setup and adds an extra layer of protection with JSON Web Tokens (JWTs). If you’re not familiar with JSON Web Tokens, check out the Open Liberty guide that explains what they are and how to use them.
This post shows you step-by-step how to configure a Liberty application that is deployed in Red Hat OpenShift to use a specific type of OIDC - Red Hat Single Sign-On (RH-SSO). We use RH-SSO in this example because it is easily available within Red Hat OpenShift. We simplify the application deployment process in Red Hat OpenShift by using the Open Liberty Operator (OLO) with special configuration to connect to RH-SSO. After we deploy the Liberty application, we configure the RH-SSO to create a client for that application. We then verify it’s set up correctly by checking that we are redirected to RH-SSO when we log in to our application. After we authenticate successfully, we’re redirected back to our application.
Overview of steps
We take a simple Java application running on Liberty, deploy it to Red Hat OpenShift, and configure it to use RH-SSO. This process involves the following steps:
Set up the example application project from our social media guide
Before we get into the details of configuring security, we first need to set up an example application to apply this security to. For this example, we use the application from the Authenticating users through social media providers Open Liberty Guide.
Start by cloning the Git repository for this guide:
git clone https://github.com/OpenLiberty/guide-social-media-login.git
cd guide-social-media-login
The guide uses GitHub for application authentication through the Open Liberty Social Media Login feature. However, in this post, instead of directly using social platforms to authenticate with our application, we use OIDC through RH-SSO.
Our first task is to run the application on our machine before containerize it. However, before we run the application, we need to make some changes to the server.xml file.
Navigate to the start/ directory. Update the server.xml file with the following configuration:
<server description="Social Login Guide Server">
    <featureManager>
        <feature>pages-3.1</feature>
        <feature>appSecurity-5.0</feature>
        <feature>transportSecurity-1.0</feature>
        <feature>mpConfig-3.0</feature>
        <feature>restfulWSClient-3.1</feature>
        <feature>cdi-4.0</feature>
        <feature>jsonb-3.0</feature>
        <feature>jwt-1.0</feature>
        <feature>socialLogin-1.0</feature>
    </featureManager>

    <httpEndpoint httpPort="9080"
                  httpsPort="9443"
                  id="defaultHttpEndpoint"
                  host="*" />

            <!-- when running with Open Liberty Operator, server.xml doesn't need to specify a keystore/truststore, using the ENV var SEC_TLS_TRUSTDEFAULTCERTS and overrides/truststore.xml
    <keyStore id="defaultKeyStore"
              password="changeit" />

    <ssl id="defaultSSLConfig"
         keyStoreRef="defaultKeyStore"
                    trustDefaultCerts="true" />
            -->

    <webApplication location="guide-social-login.war">
        <application-bnd>
            <security-role name="users">
                <special-subject type="ALL_AUTHENTICATED_USERS"/>
            </security-role>
        </application-bnd>
    </webApplication>
</server>
This edited server.xml provides the socialLogin-1.0 feature to your application and adds the required ports. The configuration for the keystore and truststore is commented out because you won’t need it when you run the application with the Open Liberty Operator.
Build and run the updated application
After you update the server.xml file, you’re ready to build and run the application. Before you can deploy this application to OpenShift Container Platform (OCP), you first need to build the WAR file for the application. Later, you can use this WAR file in a container image to deploy this application in OCP. To build the application, run the following command:
mvn package
This command builds a target/guide-social-login.war archive.
To test that your application is working correctly, run the application on your local machine first. Use the following commands:
cd start
mvn liberty:run
These commands install the application on the Liberty runtime and then start Liberty and the application. If everything completes successfully, you see the following message:
Application guide-social-login started ..
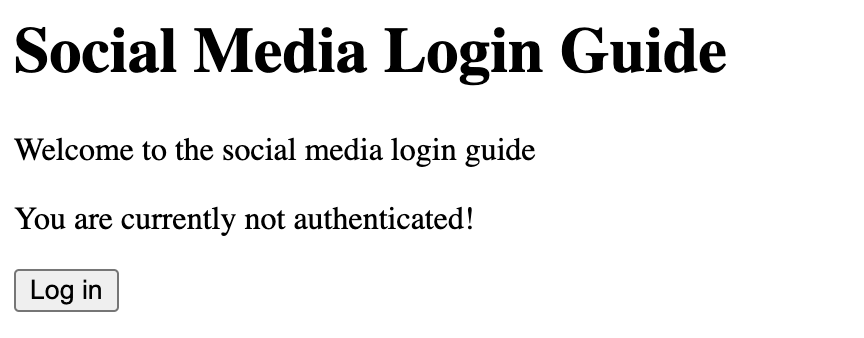
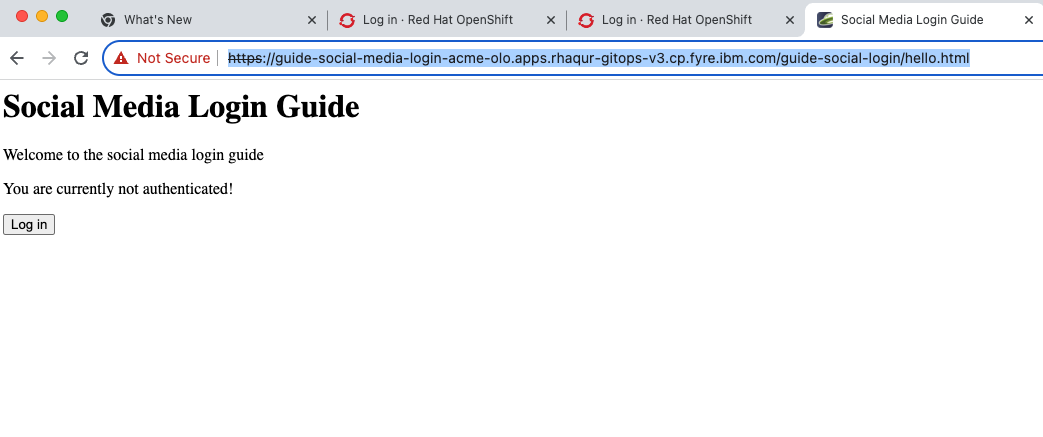
Access the application at the following URL: http://localhost:9080/guide-social-login/hello.html
You’ll see a page that says "Welcome to the social media login guide", with a button to log in.
After you finish checking out the application, stop the LIberty runtime by pressing CTRL+C in the command-line session where you started the runtime. We can now include the WAR file that you built in a container image and deploy this application in OCP.
Containerizing the application
To deploy the application on Red Hat OpenShift with the Open Liberty Operator, you must first containerize it using the Open Liberty image. For this example, we use an official image from the IBM Container Registry (ICR) as the parent image.
In the start/ directory of the application you checked out from Git, create a Dockerfile with the following content. Build the application image by using this Dockerfile, and upload to a repository of your choice (for example Dockerhub or Artifactory). Make a note of the image location so that you can use it later on to deploy this application to Red Hat OpenShift with the OLO. For more information about containerizing Liberty applications, see our containerization guides.
#Use latest Open Liberty build
FROM icr.io/appcafe/open-liberty:full-java17-openj9-ubi


# Optional functionality
ARG TLS=true
ARG SEC_SSO_PROVIDERS="oidc"
#ARG OPENJ9_SCC=false
ARG VERBOSE=true

# trust certificates from well-known CA's
ENV SEC_TLS_TRUSTDEFAULTCERTS=true

# trust certificates from within the cluster, such as Red Hat SSO.
ENV SEC_IMPORT_K8S_CERTS=true


COPY --chown=1001:0  src/main/liberty/config/server.xml /config/
COPY --chown=1001:0  target/guide-social-login.war /config/apps


# This script adds the requested XML snippets and grows the image to be fit-for-purpose
RUN configure.sh-
Ensure that you set the
ENV SEC_TLS_TRUSTDEFAULTCERTSandENV SEC_IMPORT_K8S_CERTSenvironment variables to true so you can trust all the certificates from within the cluster. -
By specifying
ARG SEC_SSO_PROVIDERS="oidc", you tell the configuration that the SSO provider is OIDC.
You can find out more about the available configuration options in the Open Liberty container image Open Liberty container image SSO documentation.
Now, we can move on to the next step, installing and configuring the Red Hat OpenShift cluster to deploy this application to.
Install and configure the RH-SSO Operator in the Red Hat OpenShift cluster
Complete the following steps to set up the Red Hat OpenShift cluster so that you can use RH-SSO.
-
To install RH-SSO in the
rh-ssonamespace, follow the instructions that are provided in the Red Hat Single Sign-On Operator documentation. -
Create and log in to a KeyCloak instance.
After you install the RH-SSO Operator, create a KeyCloak instance that uses the default values. You can then access KeyCloak by looking at the routes. The route is in the
https://keycloak-rh-sso.apps.<cluster_name>format.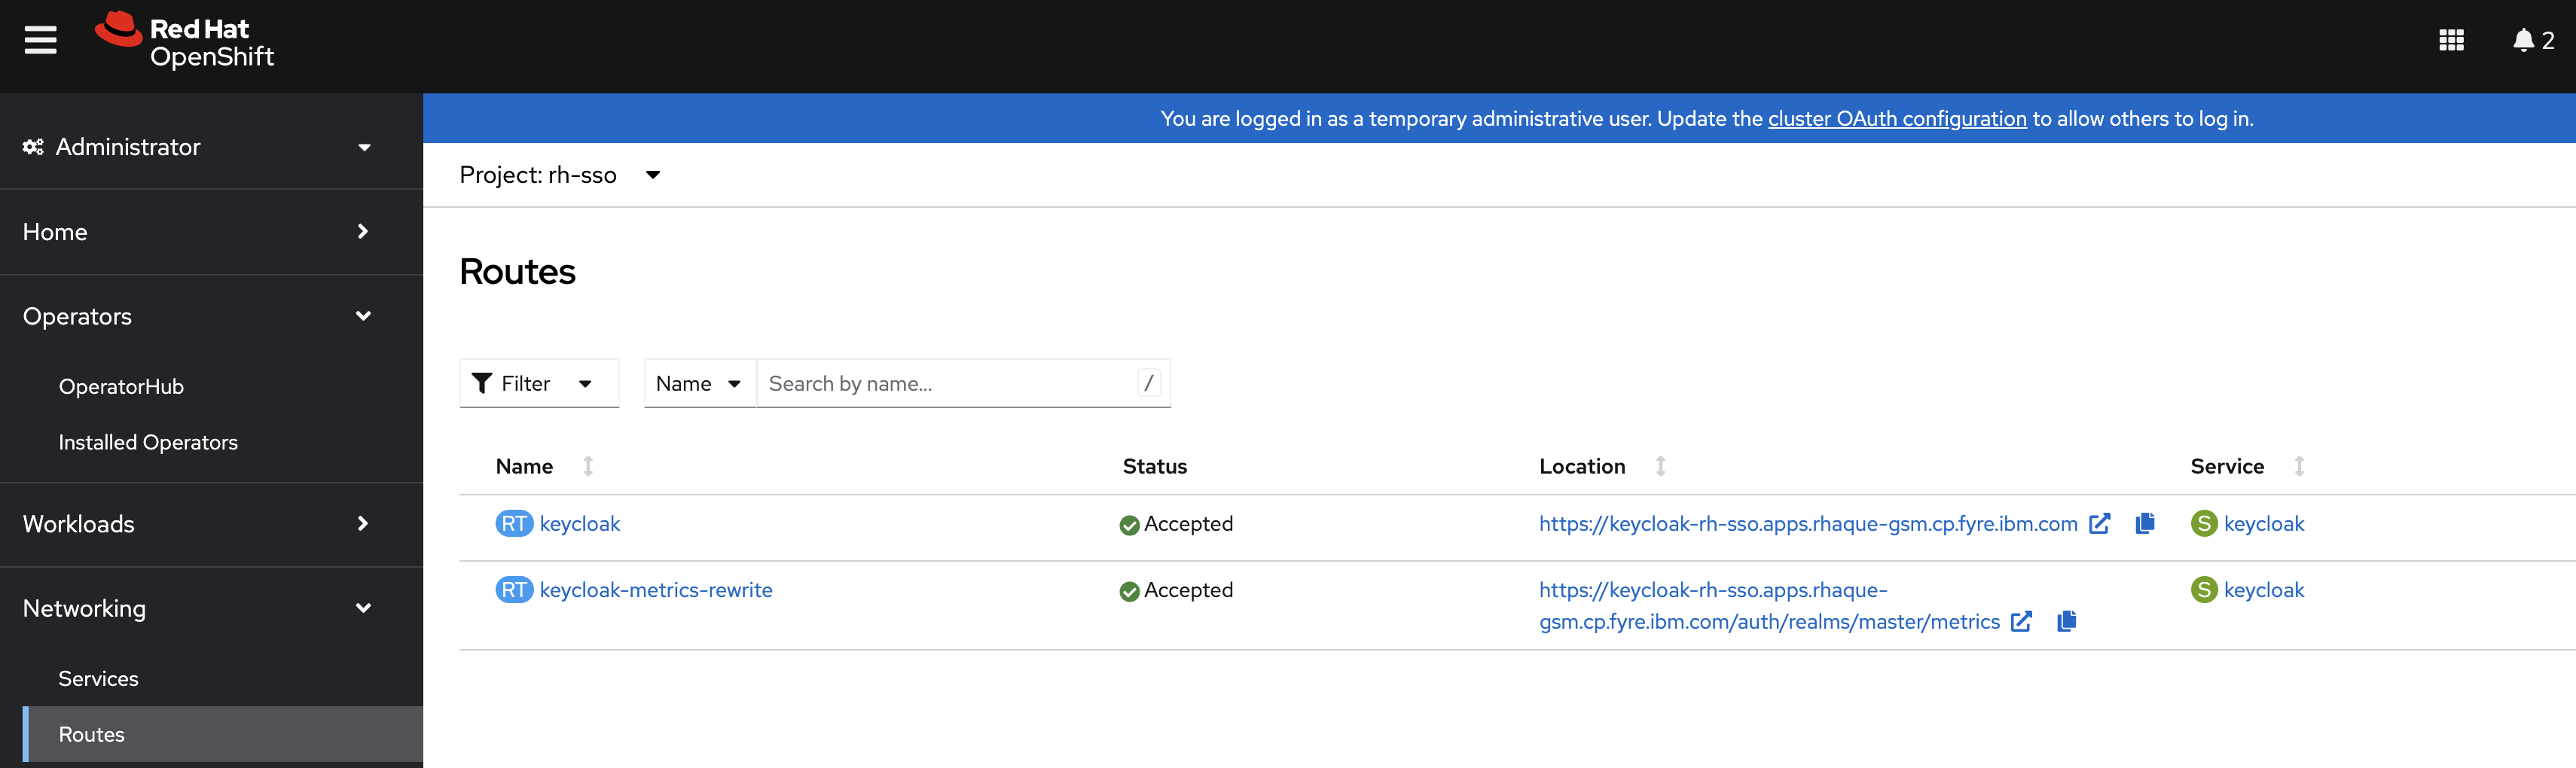
You use this URL to log in to the KeyCloak instance. The credentials for logging in are in the
credential-example-keycloaksecret in therh-ssonamespace. Get the secret password for theadminusername in this secret, then use this username and password to log in on to KeyCloak. -
Create a realm named
sso-realm. Use the following URL to access this realm:https://keycloak-rh-sso.apps.<cluster-name>/auth/admin/master/console/#/realms/sso-realm -
Create a non-admin user for this realm.
Create a user called
testuser1by selecting Manage > Users > Add user. Specifytestuser1for Username and click Save. We can use this user to test the social login when RH-SSO is used as an OIDC provider.
-
Select the Credentials tab and specify
testpasswd1as the password for the user you created. -
Change the Temporary option from
ONtoOffand click Reset Password. -
On the confirmation dialog, select Change Password.
-
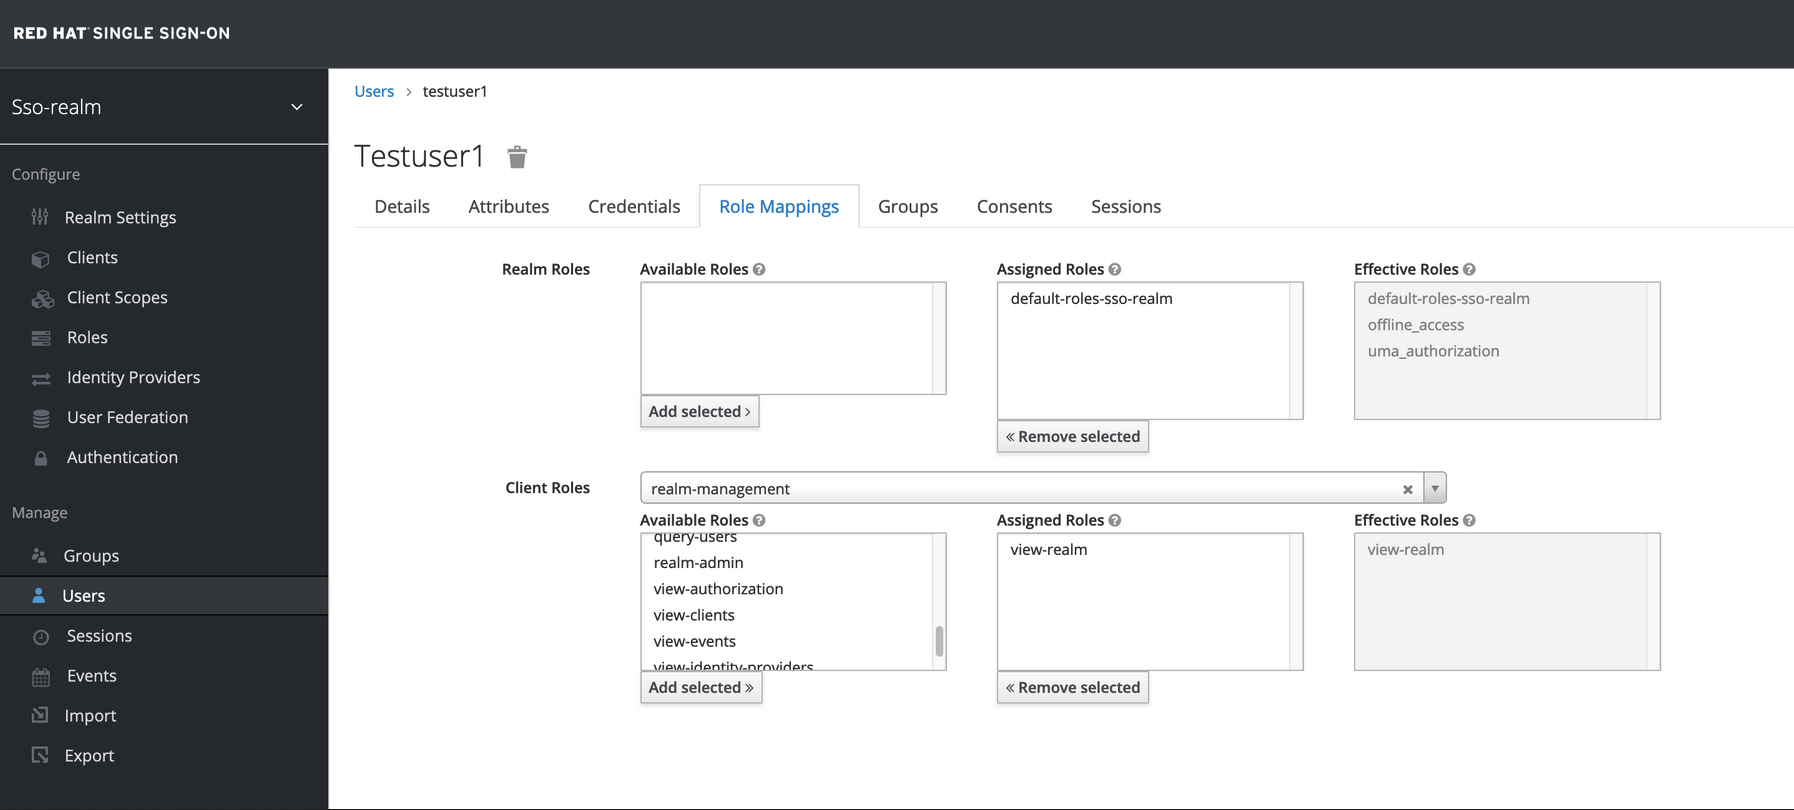
Go to the Role Mappings tab.
-
Click Client Roles menu and select realm-management. After you make this selection, boxes such as Available Roles appear.
-
Under Available Roles, search for view-realm, select it, and click Add selected. After the role is selected, it appears under
Assigned RolesandEffective Roles.Note: Selecting the role is just a basic requirement to allow the user to log in to the console on RH-SSO. If no role is assigned, the user sees a Forbidden error message in the browser.
-
Test the user you created.
Go to the
https://keycloak-rh-sso.apps.<cluster-name>/auth/admin/Sso-realm/console/URL and log in by using thetestuser1/testpasswd1username you created in the previous steps. After you log in, in the General section, you can see the endpoints. -
Click the link for the OpenID Endpoint Configuration, which points you to the following URL:
https://keycloak-rh-sso.apps.<cluster-name>/auth/realms/sso-realm/.well-known/openid-configuration.You need this URL as the
discoveryEndpointfor the client registration later on.
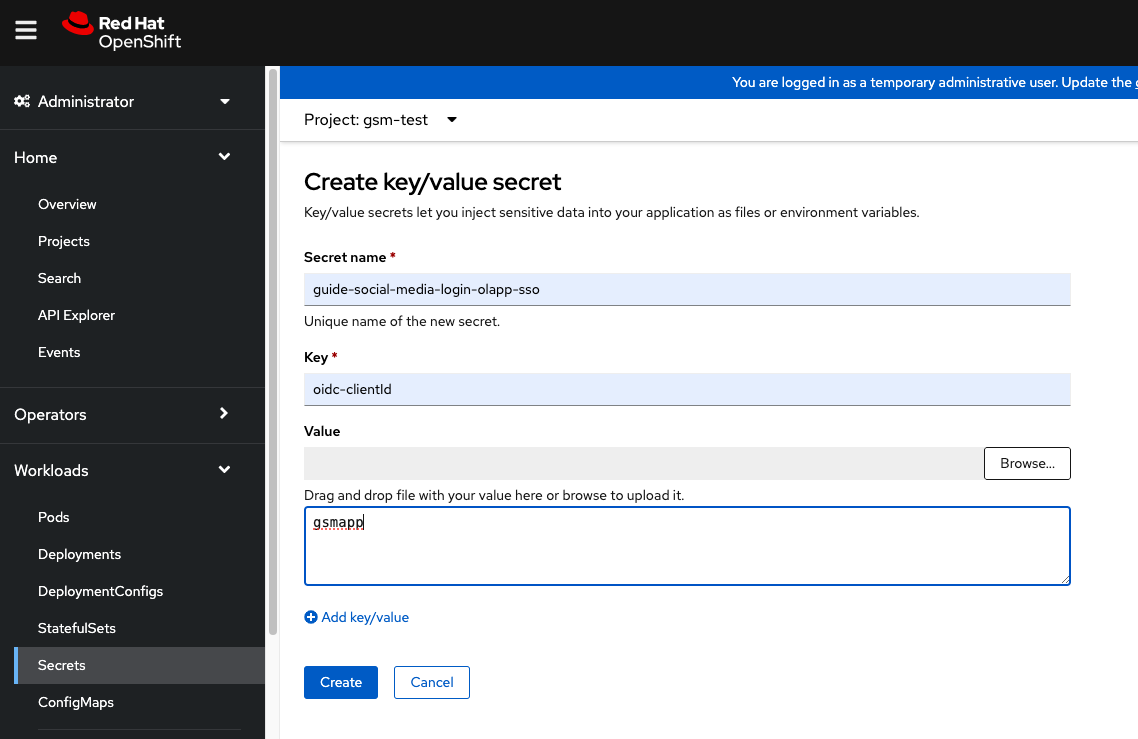
Create the olapp-sso secret
Next, we create a secret for the Open Liberty application. The key name for this secret is in the <app-name>-olapp-sso format. You must use the same <app-name> as the one you use to deploy the application with OLO. For example, in the application that is used in this post, the <app-name> from the YAML file is guide-social-media-login, so the secret name is guide-social-media-login-olapp-sso.
-
Create a project in your cluster called
gsm-test. -
Click Workloads > Secrets > Create Secret, a create a secret that is called
guide-social-media-login-olapp-sso. Specifyoidc-clientIdas the Key andgsmappas the Value.
Install the Open Liberty Operator and deploy the application to Red Hat OpenShift
If the Open Liberty Operator (OLO) isn’t already installed in your OCP cluster, install it by following the user guide.
After installing the Open Liberty Operator, use the following YAML file to deploy the guide-social-media-login application that you previously created.
apiVersion: apps.openliberty.io/v1
kind: OpenLibertyApplication
metadata:
  name: guide-social-media-login
  namespace: gsm-test
spec:
  sso:
    oidc:
      - discoveryEndpoint:
          <https://keycloak-rh-sso.apps.<cluster-name>/auth/realms/sso-realm/.well-known/openid-configuration>
  service:
    port: 9443
  applicationImage:
    <image location of the app>
  expose: true
  manageTLS: true
  replicas: 1
  applicationName: guide-sm-login
  pullPolicy: Always
pullSecret: <secret_to_pull_image>-
The name of the application is
guide-social-media-login, the same name that was used when you created the previous secret. -
The
oidc: discoveryEndpointmust point to the OpenID endpoint configuration that you set when you configured the RH-SSO Operator. -
The
applicationImagevalue must point to your image location where you placed your application image, in a container registry like DockerHub or Artifactory. -
The
pullSecretvalue must be set to the name of the secret that contains the credentials for your chosen container registry.
Create the OIDC Client in RH-SSO
Next, you must register your application as an OpenID client in RH-SSO. Since we already deployed the guide-social-media-login app by using the Open Liberty Operator, we can now complete the registration for the OpenID client.
Follow these steps to create your application as an OpenID client:
-
Access the console for the RH-SSO by using the
https://keycloak-rh-sso.apps.<cluster-name>/auth/admin/master/console/URL. Log in to the console by using the credentials from thecredential-example-keycloaksecret defined in your OCP cluster. -
Create a client.
Click Create and specify
gsmappas the clientId. This value is the same value that you put in theguide-social-media-login-olapp-ssosecret. Click Save. -
On the settings page, ensure Enabled is set to
ON, so the client is enabled for login, and Access Type is set topublic, which doesn’t require a secret for login. -
Specify the URL for Valid Redirect URIs. In the scenario with
oidcLogin, the URL is in the following format:https://<app-name>-<namespace>.apps.<cluster-name>/ibm/api/social-login/redirect/oidcSince you already deployed the
guide-social-media-loginapplication, use this value for the Valid Redirect URI, substituting<cluster-name>with the name of your cluster, for example:https://guide-social-media-login-gsm-test.apps.<cluster-name>/ibm/api/social-login/redirect/oidc. -
Click Save.
Run the application and log in using OIDC
Congratulations! You’ve now completed all the required configurations to use SSO to log in to your application. Now, you’re ready to run the application. When you click the Log In button for the app, it redirects you to the RH-SSO console, where you can log in using the username and password that you created earlier.
-
Access the application URL by getting the route of the application from the
gsm-testproject. It is in the following format:https://guide-social-media-login-gsm-test.apps.<cluster-name>/guide-social-login/hello.htmlThe application is similar to the following example.
-
Click the Log In button. Because you already registered the RH-SSO client for this application, it redirects you to the RH-SSO client.
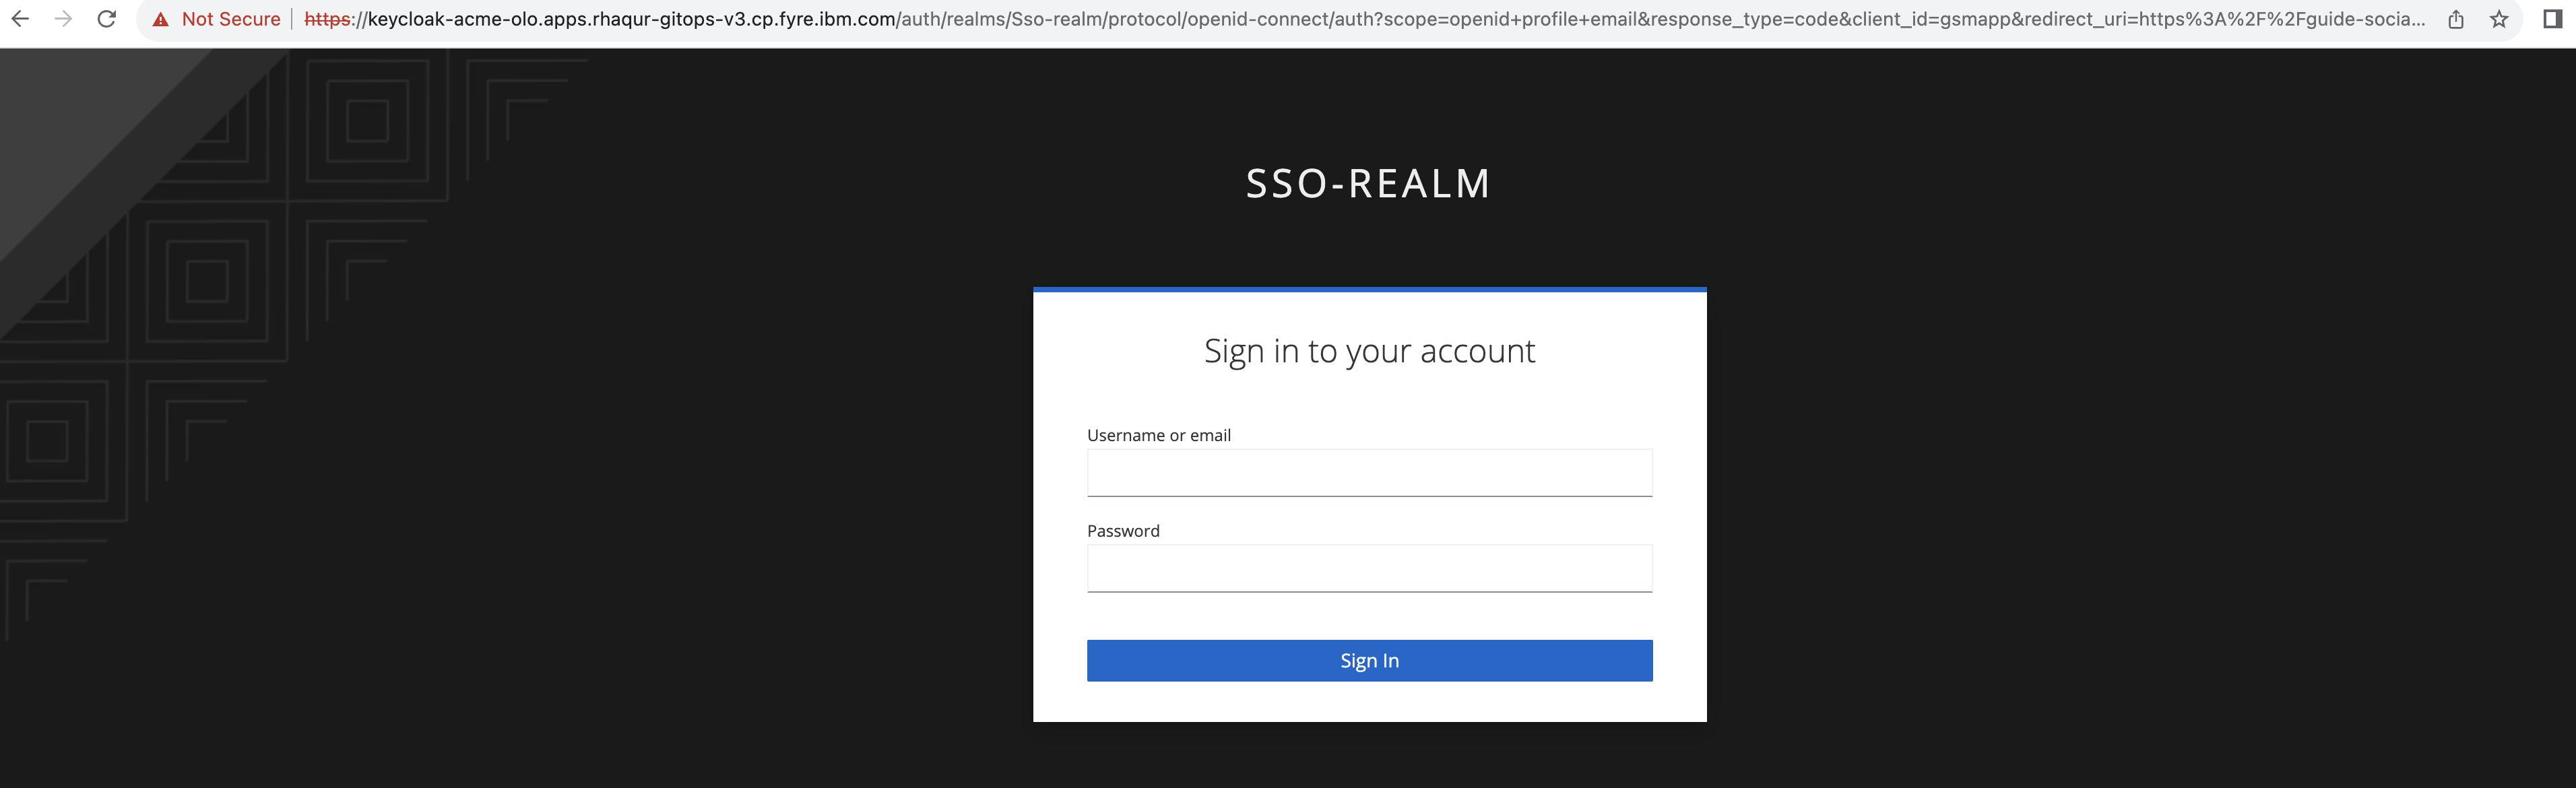
-
Log in using the
testuser1/testpasswd1username and password.You are redirected to the application, where you are now authenticated.
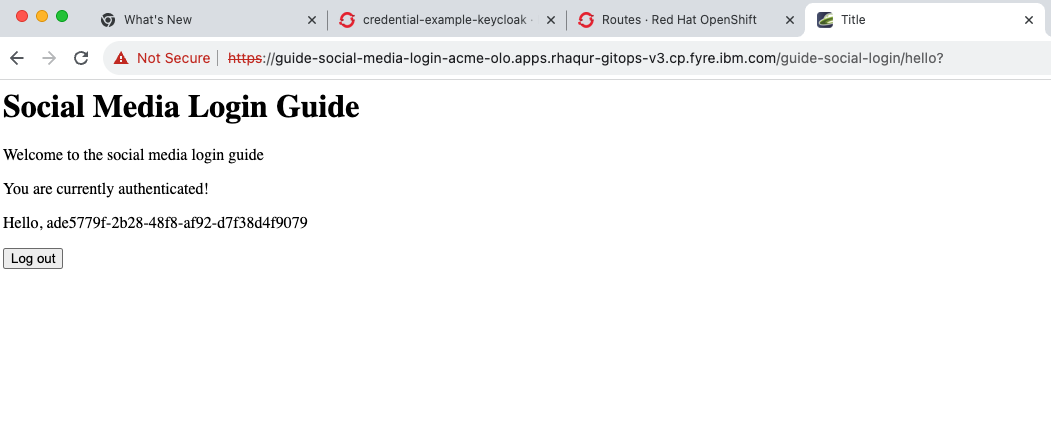
By following these steps, you successfully secured your Liberty application running in Red Hat OpenShift and you can authenticate and authorize your users with RH-SSO.
Next steps
To continue your education of securing your cloud native Java applications, check out the interactive, hands-on security guides the Open Liberty website.


