 See all blog posts
Protect your applications with Jakarta Security, MicroProfile JWT, and Keycloak
As our infrastructure evolves and cloud-native technologies and platforms become ever more popular, it’s clear that a security-first approach is crucial for building enterprise Java applications. The Log4Shell vulnerability highlighted the importance of security, which is also emphasized in cloud-native application methodologies like the 15-factor app methodology.
So, we know it’s important… but how can we practically apply this to secure our own applications? This post demonstrates how to use Keycloak to secure a Liberty application that uses Jakarta EE and MicroProfile open source standards.

An introduction to Keycloak
Keycloak is an open source Identity and Access Management (IAM) tool that provides important capabilities such as single sign-on (SSO), user federation, strong authentication, user management, fine-grained authorization, and more. It helps to streamline the authentication process, removing the need for developers to worry about storing or authenticating users. Keycloak was originally created by Red Hat and is now used for their SSO. It is an enterprise-level tool and so is well suited to enterprise applications and enterprise-focused tools and standards, such as Liberty, MicroProfile, and Jakarta EE.
Connecting Open Liberty with Keycloak
Open Liberty can easily integrate with Keycloak, which can be used as an OpenID Connect Provider, by using Jakarta Security and MicroProfile JWT. Jakarta Security defines a standard for creating secure Jakarta EE applications in modern application paradigms. A JSON Web Token (JWT) is a self-contained token that securely transmits information as a JSON object. The information in this JSON object is digitally signed and can be trusted and verified by the recipient. MicroProfile JSON Web Token is a specification that defines the JWT as a bearer token in a microservices request to authenticate users. If you’d like to learn more about this specification, check out our interactive, hands-on Open Liberty guide: Securing microservices with JSON Web Tokens.
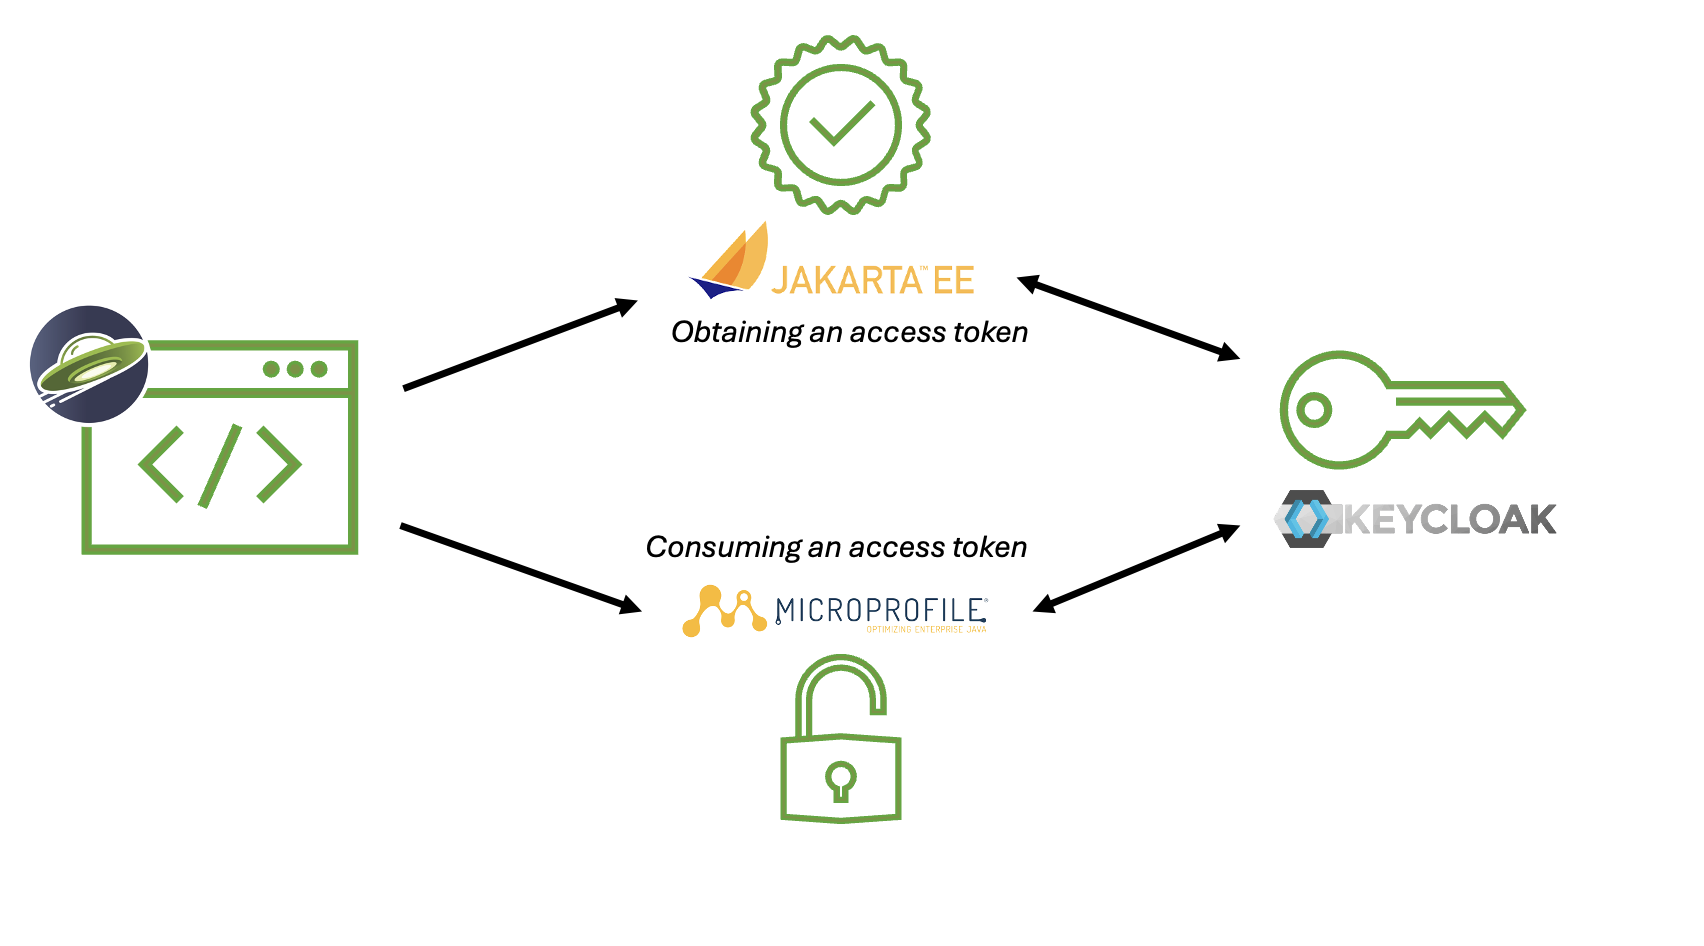
We’ll demonstrate how to integrate an Open Liberty application with Keycloak by showing how to obtain access tokens from Keycloak using Jakarta Security. We then show how access tokens can be consumed from Keycloak by using MicroProfile JWT.

Before you begin
Keycloak uses the terms realm and client. A realm is a space where you manage objects, including users, applications, roles, and groups. A client is an entity that can request Keycloak to authenticate a user.
In this blog post, the following prerequisites are set:
-
A Keycloak server is set up with a realm called
openliberty, which contains a client that is calledsample-openliberty-keycloakand the realm roles ofadminanduser. -
Client authentication is enabled for the
sample-openliberty-keycloakclient. -
http://localhost:9090/Callbackis added as a valid redirect URI. -
The
microprofile-jwtclient scope is set toDefault.
Obtaining an access token from Keycloak using Jakarta Security
With the new @OpenIdAuthenticationMechanismDefinition annotation introduced in Jakarta Security 3.0, you can easily authenticate users with Keycloak and obtain an access token.
This example shows how to configure the @OpenIdAuthenticationMechanismDefinition annotation to set up an authentication flow with Keycloak.
@OpenIdAuthenticationMechanismDefinition(
        providerURI = "http://localhost:8080/realms/openliberty/.well-known/openid-configuration",
        clientId = "sample-openliberty-keycloak",
        clientSecret = "x4fRVAhk49TKDqVlzIt4q9oh8DSWfePt",
        redirectToOriginalResource = true,
logout = @LogoutDefinition(notifyProvider = true))-
The
providerURIis the discovery endpoint for theopenlibertyrealm. -
The
clientIdis the client ID of thesample-openliberty-keycloakclient. -
The
clientSecretis the secret that belongs to thesample-openliberty-keycloakclient. -
By default, the redirect URI is set to
http://localhost:9090/CallbackandredirectToOriginalResourceis set totrueto redirect users from the redirect URI back to the originally requested resource. -
notifyProviderin the@LogoutDefinitionis set totrueto also log the user out of Keycloak when a logout occurs in your Open Liberty application.
Now, with this annotation set up, your REST endpoints can be protected by using the @RolesAllowed annotation, which triggers the authentication flow when a user tries to access the endpoint.
After authentication, the user’s access token can be obtained by using the OpenIdContext.
The following example code shows a JAX-RS resource that contains a /username endpoint, which is accessible only by users with the admin role, and an /os endpoint, which is accessible by users with either the admin or user role.
@ApplicationScoped
@Path("/system/properties")
public class SystemResource {

    @Inject
    @RestClient
    private SystemService systemService;

    @Inject
    private OpenIdContext openIdContext;

    @GET
    @Path("/username")
    @RolesAllowed({ "admin" })
    public String getUsername() {
        return systemService.getUsername(openIdContext.getAccessToken().getToken());
    }

    @GET
    @Path("/os")
    @RolesAllowed({ "admin", "user" })
    public String getOS() {
        return systemService.getOS(openIdContext.getAccessToken().getToken());
    }

}
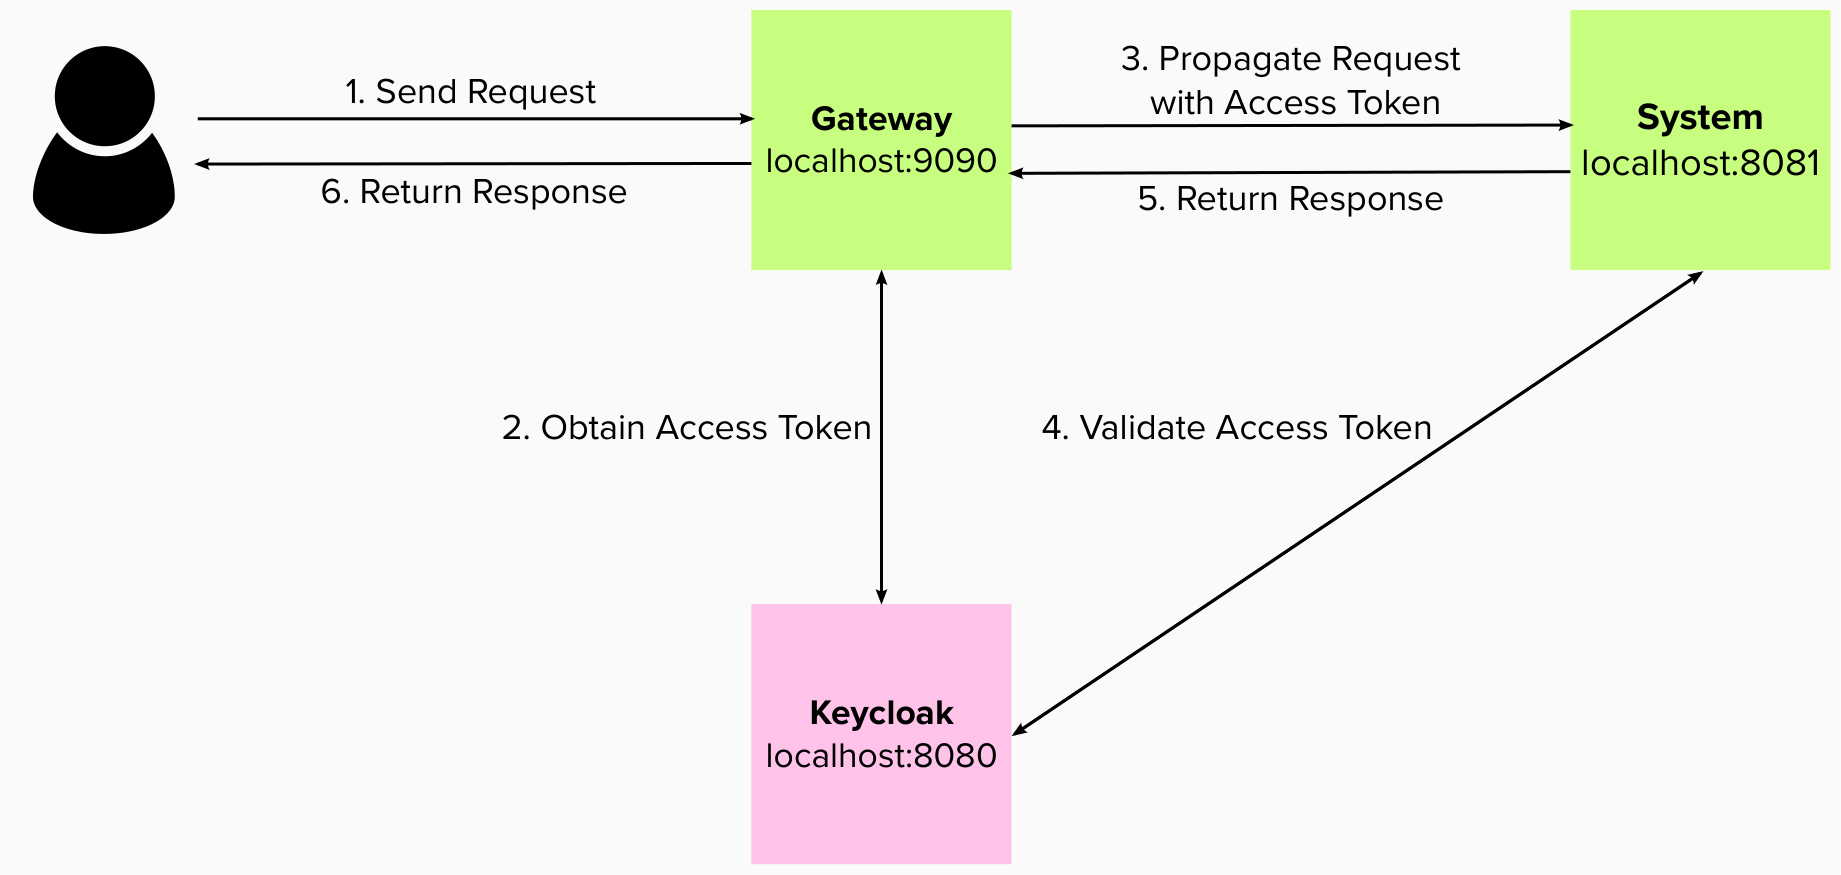
After the requests to these endpoints are authenticated and authorized, the endpoint can use the access token of the authenticated user.
In this example, the access token is used as a bearer token to make a request to another protected resource by including it in the request header in the Authorization: Bearer <access-token> format.
The next section demonstrates how this bearer token can be consumed by an Open Liberty application that uses MicroProfile JWT to protect its resources.
Consuming an access token from Keycloak using MicroProfile JWT
MicroProfile JWT can easily be used to consume access tokens that are sent as bearer tokens.
The following example shows the MicroProfile Config properties that are required to validate an access token issued by the openliberty realm in Keycloak. You can set these properties in your microprofile-config.properties file or in any configuration source that is available to MicroPofile config.
mp.jwt.verify.issuer=http://localhost:8080/realms/openliberty
mp.jwt.verify.publickey.location=http://localhost:8080/realms/openliberty/protocol/openid-connect/certs-
The
mp.jwt.verify.issueris the endpoint of theopenlibertyrealm. -
The
mp.jwt.verify.publickey.locationis the JSON Web Key Sets (JWKS) endpoint of theopenlibertyrealm.
By adding these configuration properties to our application, MicroProfile JWT is now set up to validate access tokens issued by the openliberty realm sent as bearer tokens to resources that are protected by using the @RolesAllowed annotation.
Just as we did in the previous section of this post, the following example shows a JAX-RS resource that contains a /username endpoint only accessible by users with the admin role and an /os endpoint accessible by users with either the admin role or the user role. However, this example expects an access token to be included in the request header as a bearer token. The previous section’s example started a new authentication flow to get an access token.
@RequestScoped
@Path("/properties")
public class SystemResource {

    @GET
    @Path("/username")
    @RolesAllowed({ "admin" })
    public String getUsername() {
        return System.getProperties().getProperty("user.name");
    }

    @GET
    @Path("/os")
    @RolesAllowed({ "admin", "user" })
    public String getOS() {
        return System.getProperties().getProperty("os.name");
    }

}
After the requests to these endpoints are authenticated and authorized, the endpoint returns information about the system properties.
Summary
This post emphasises the importance of effective security for our cloud-native Java applications. To secure an application, we focused on authentication and authorization, demonstrating how to easily protect your applications using Jakarta Security, MicroProfile JWT, and Keycloak! If you’re interested to learn more, check out the full sample application.


