Developing a cloud-native Java application with Liberty Tools in IntelliJ IDEA

Given the rapid rate of technological change, the array of tools available, and the rising complexity of cloud-native applications, it can be difficult to know how to start creating a cloud-native Java application. This short post leads you through creating a simple cloud-native Java application and editing it within an IDE, all within just 10 minutes! Read on to learn how to easily create a Liberty Maven project for a new cloud-native Java application by using the Open Liberty Starter and to edit your application using the Liberty Tools in IntelliJ IDEA.
Before you start
Installing Java
Install either Java 17 or Java 21. You can download IBM Semeru Runtimes for free. Semeru integrates well with Liberty, but you can find out more about Semeru and other Java distributions in this article.
When the Java installation is complete, ensure the JAVA_HOME variable is properly configured in your system path. The JAVA_HOME variable is essential for Maven Liberty projects because it indicates which JVM to use. Locate the Java installation path on your system, and then export or set the JAVA_HOME environment variable using the following command (Linux and Mac):
export JAVA_HOME=<your Java installation path>Installing Liberty Tools for IntelliJ IDEA
Liberty Tools is a plugin for IntelliJ IDEA that helps you develop, test, debug, and manage Liberty applications in IntelliJ.
To install Liberty Tools in IntelliJ IDEA:
-
Start IntelliJ IDEA.
-
Click Plugins or open the Plugins section of the Settings window.
-
Search the Plugins Marketplace for
Liberty Tools. If nothing is found, check whether you have a supported version of IntelliJ IDEA. -
Install Liberty Tools then restart the IDE.
When the IDE restarts, Liberty Tools is installed and enabled.
Creating a Liberty Maven project with the Open Liberty Starter
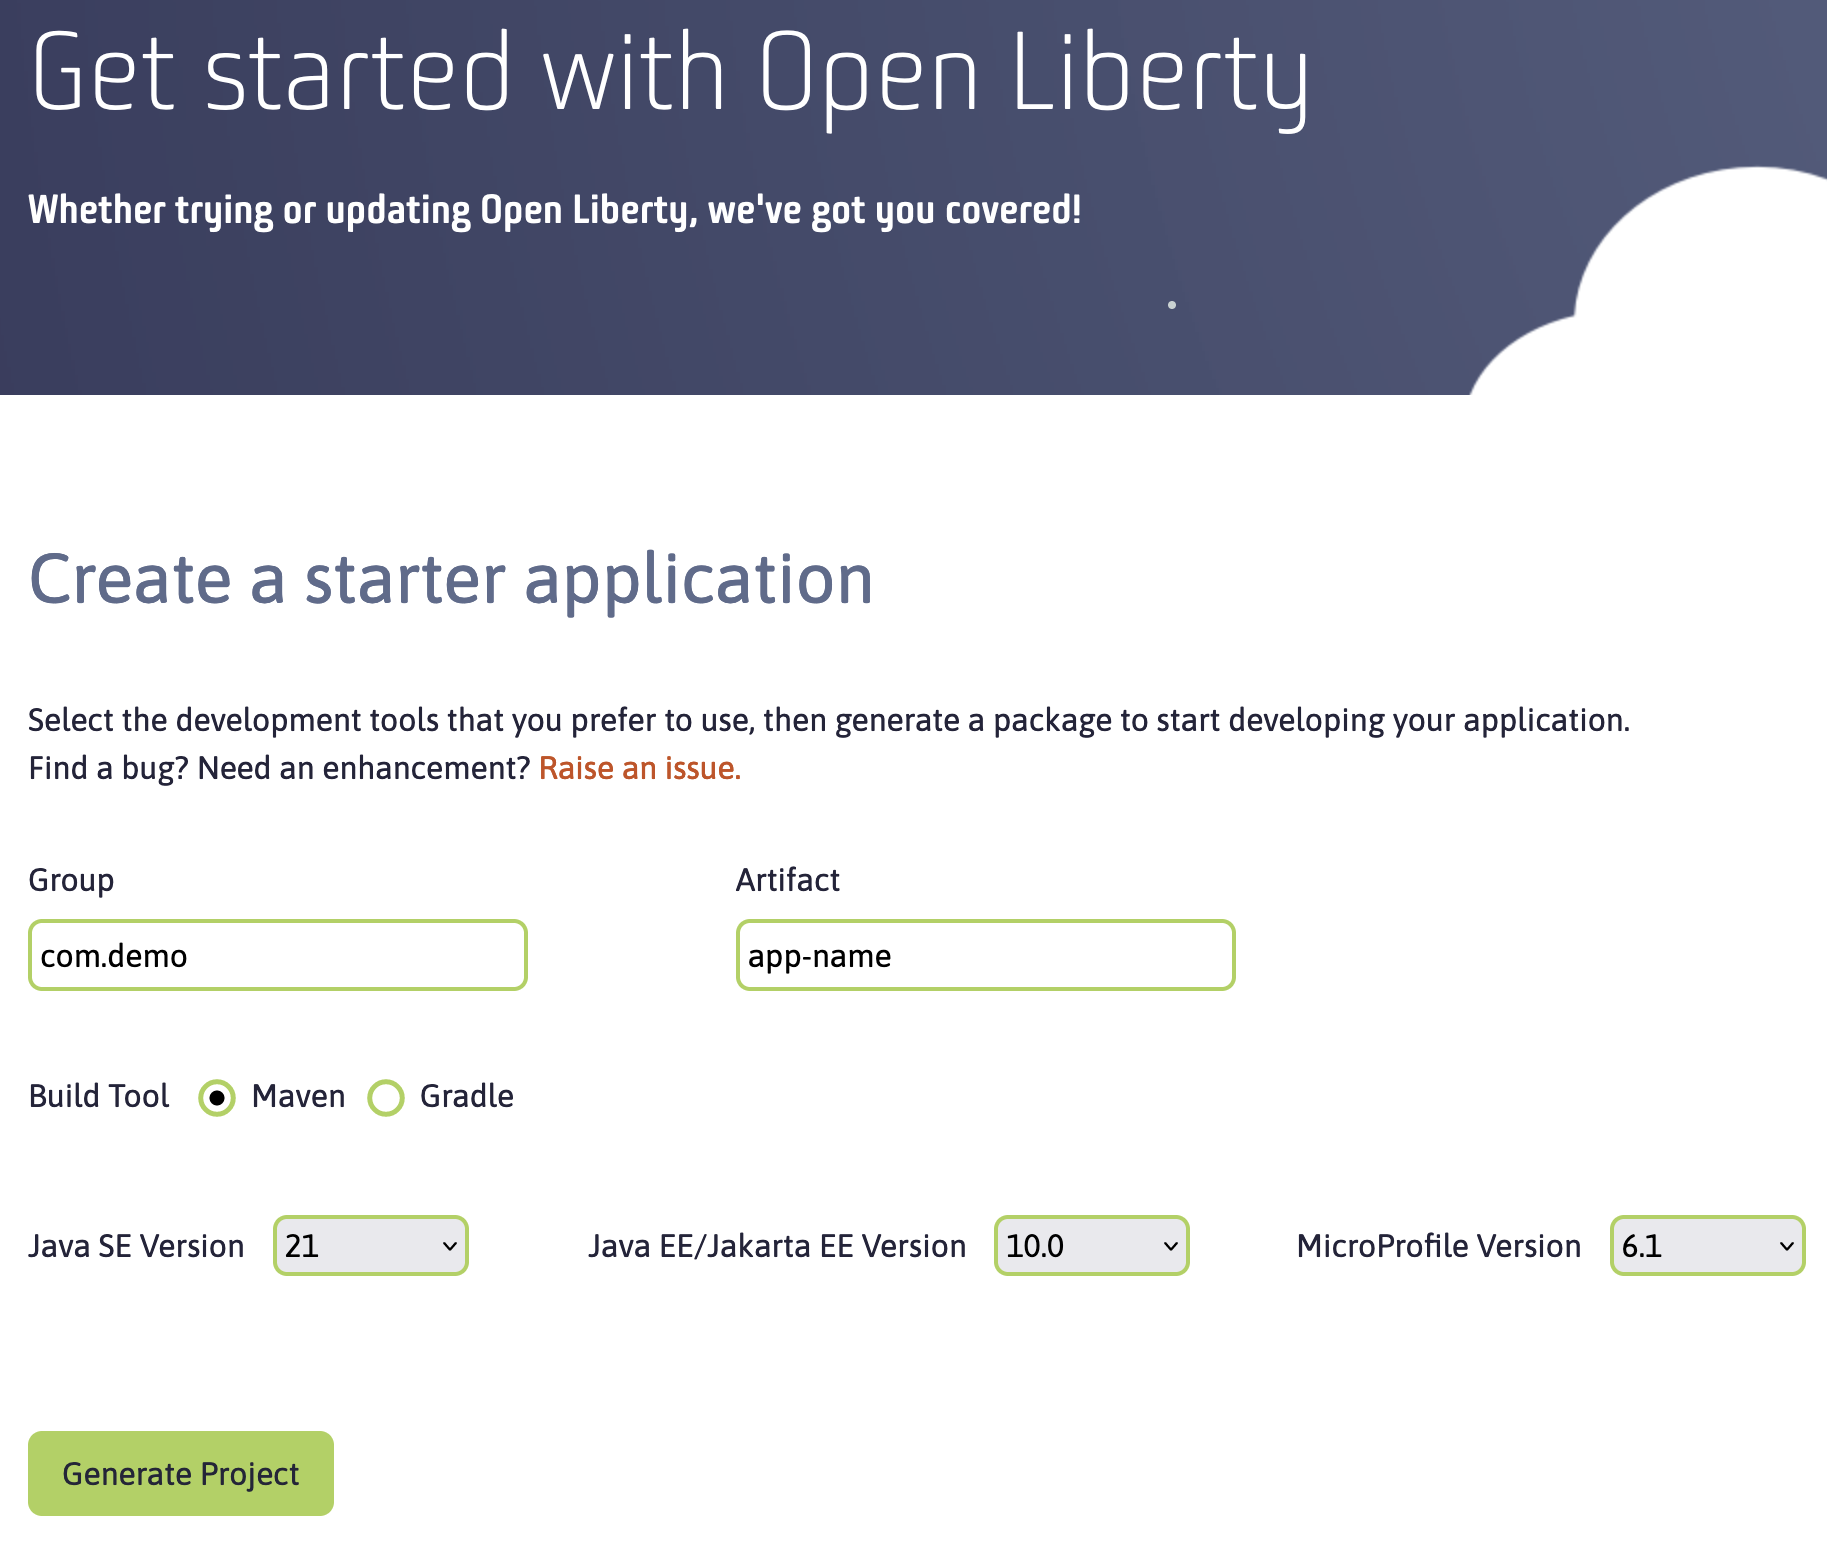
The Open Liberty Starter provides a simple way to create a Liberty Maven project. This Maven project contains all the files and project structure that you need to get started writing your cloud-native Java app. You can easily modify the project configuration in the pom.xml and server.xml files to add more or different options later, if necessary.
To create your project:
-
Visit the Open Liberty Starter.
-
Accept the default values by clicking Generate Project and download your project.
Importing your project into IntelliJ IDEA
When you import a Liberty Maven project into IntelliJ IDEA, Liberty Tools automatically detects the project.
To import your Liberty Maven project:
-
Extract the
app-name.zipfile that you downloaded from the Open Liberty Starter. The file extracts to a project folder calledapp-name, which you can optionally move elsewhere on your file system before you continue. -
In the IDE, click File > Open…, select the project folder, then click Open.
Your project is imported into IntelliJ IDEA and detected by Liberty Tools.
Overview of the Liberty Maven project
Project structure
After importing a project into the IDE, the Project view displays the Liberty Maven project structure, as shown in the following image:
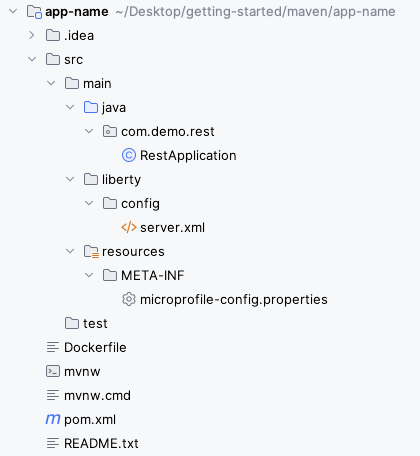
A well-organized file structure is crucial for Maven projects, providing a clear framework for development. This hierarchy includes directories for application code, MicroProfile and Liberty configuration files, and tests:
-
src/main/java: Java application code files -
src/main/liberty/config: Liberty configuration files -
src/main/resources/META-INF: MicroProfile configuration files -
src/test: Test files -
Dockerfile: Dockerfile for building the Docker image -
mvnwormvnw.cmd: Maven Wrapper script for Unix-like or Windows operating systems
In the app-name directory, the pom.xml file contains configuration details for the project, including dependencies, plugins, and other settings.
Declaring dependencies
If you need to add any Liberty features to your app (such as JPA support), update the Maven project configuration in the pom.xml file.
To declare dependencies, edit the <dependencies> section of the pom.xml file, as shown in the following example:
<dependencies>
    <dependency>
        <groupId>jakarta.platform</groupId>
        <artifactId>jakarta.jakartaee-api</artifactId>
        <version>10.0.0</version>
        <scope>provided</scope>
    </dependency>
</dependencies>
In this example, the jakarta.jakartaee-api API from the jakarta.platform project is introduced as a dependency for this project.
You can add more dependencies to your Maven project from the Maven Library.
Adding Maven plugins
In IntelliJ IDEA , like many other development tools, you can enhance the functionality of Maven by adding Maven plugins. Maven plugins are commonly used for compiling code, running tests, and packaging applications.
The Open Liberty Starter configures the Liberty Maven Plugin in your Maven project by default. The Liberty Maven Plugin provides several goals for managing a Liberty runtime, including tasks such as downloading and installing the Liberty runtime, starting or stopping a Liberty server in development mode, installing features, and deploying applications.
You can see where the Liberty Maven Plugin is configured in your Liberty Maven project in the pluginManagement section of the pom.xml:
<pluginManagement>
    <plugins>
        <plugin>
            <groupId>io.openliberty.tools</groupId>
            <artifactId>liberty-maven-plugin</artifactId>
            <version>3.10.2</version>
        </plugin>
    </plugins>
</pluginManagement>
In this example, the liberty-maven-plugin from io.openliberty.tools is added to this project.
For more information, see the Liberty Maven Plugin docs.
Efficiently edit your application with Liberty dev mode
Liberty Tools enhances the application development experience with Open Liberty by providing convenient features that are integrated directly into your IDE, including the Liberty Dashboard and Liberty dev mode.
The Liberty Dashboard effectively manages Maven projects, seamlessly integrating configurations for Open Liberty. It facilitates rapid development of MicroProfile and Jakarta EE applications by offering automatic code blocks, auto-complete functionality, and real-time syntax validation. With just a few clicks, you can start or stop your app, run tests, and check reports.
Liberty dev mode can swiftly apply code changes to your running app without needing to restart the server, ensuring faster development.
Click the Open Liberty logo in the IDE window to open the Liberty tool window, which provides a set of actions to help you to manage your app (e.g. starting and stopping the Liberty runtime instance):
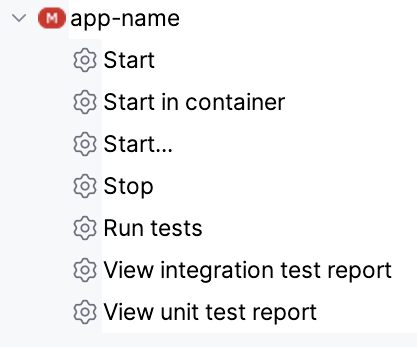
Liberty Tools offer three ways to start your Liberty application in dev mode: Start, Start with configuration, or Start in a container.
For now, click the Start action to simply start your application in dev mode.
Dev mode automatically detects, recompiles, and deploys code changes whenever you save a new change in your IDE or text editor. The following example creates a simple REST resource Java file.
Ensure that Liberty dev mode is running, then create the following Java class file named HelloWorldResource.java as the REST resource:
src/main/java/com/demo/rest/HelloWorldResource.javaPaste the following code into the file:
package com.demo.rest;

import jakarta.ws.rs.GET;
import jakarta.ws.rs.Path;
import jakarta.ws.rs.Produces;
import jakarta.ws.rs.core.MediaType;

@Path("/hello")
public class HelloWorldResource {

    @GET
    @Produces(MediaType.TEXT_PLAIN)
    public String helloWorld() {
        return "Hello, World!";
    }
}
When the console displays Web application available, the Liberty server has successfully detected, recompiled, and deployed the changes. You can now view the message drafted in the example by accessing the following link: http://localhost:9080/app-name/api/hello
For more information, see:
Next steps
In just 10 minutes, if you followed along with the instructions in this post, you successfully created a cloud-native Java application, deployed it, and edited it in an agile manner, with rapid feedback. Take your learning to the next level and further develop your application by exploring more of Open Liberty’s features or exploring the APIs supported by open source, industry standard projects like MicroProfile and Jakarta EE through our interactive guides.


